AGAT

Categories
Announcement Microsoft Teams sentiment Analysis guides webex guides

AI Sentiment Analysis of Chats & Meetings in MS Teams and Webex

Navigation:

  • What is sentiment analysis?
  • Why is sentiment analysis important?
  • What is sentiment analysis used for?
  • How does sentiment analysis work?

What is sentiment analysis?

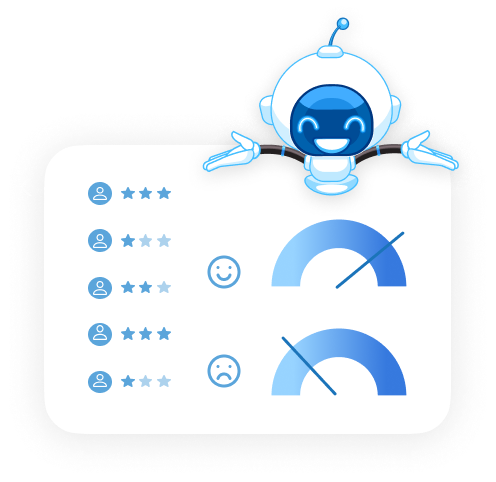
The process of analyzing call recordings and chat to determine whether the underlying emotions are positive, negative, or neutral is the definition of AI sentiment analysis.

In other words, sentiment analysis helps to find the person’s feelings in a particular situation and define the emotions involved to be either joyfulness, happiness, surprise, anger, disgust, or sadness. 

Why is sentiment analysis important?

First and foremost, AI sentiment analysis is important to help spread positive behavior to other parts of the company. With the positive and negative communications documented in every employee’s report, sentiment analysis can help businesses promote positive behavior in the workplace. This can be done by comparing employees’ performances and encouraging everyone to improve.

Furthermore, evidently, businesses must ensure that customers are receiving excellent service. Sentiment analysis can help businesses identify negative behavior and detect any interaction that may have been negative. This will help in managing the employees’ negative behavior to provide the best customer experience.

Thirdly, Understanding customers’ emotions can empower the employees with knowledge that can help them provide better service. The customer-facing team can therefore offer proactive solutions to increase customer satisfaction.

Fourthly, by analyzing employees’ communications, companies can better understand how they feel, which in turn helps reduce employee turnover and increase overall productivity.

Lastly, sentiment analysis can give visibility to employee communication with others while working remotely which in turn helps employees stay connected to their team and improve their collaboration with others.

What is sentiment analysis used for?

Sentiment analysis can be useful in different business departments or divisions. Let’s see in more detail how sentiment analysis benefits some of them.

  • Customer Success / Support Managers:

Sentiment analysis is an extremely useful tool in the customer service field as it allows businesses to improve their direct communications with customers. It can also help businesses prioritize their customer support issues by identifying and handling the most negative feedback first, which increases customer retention and satisfaction by providing quick answers.

  • HR Manager:

Sentiment analysis helps HR managers make decisions and organizational changes based on employee feedback and satisfaction to promote proactive action before any interview or conversation.

  • Employees:

Employee reports can help an employee objectively analyze their relationships with other colleagues within the organization, as well as their communication trends.

Sentiment Analysis info graphics
AI Sentiment Analysis Infographics

How does sentiment analysis work? 

AI sentiment analysis employs natural language processing and machine learning algorithms to classify text and audio pieces as positive, neutral, or negative.

  • Natural Language Processing:

NLP uses computer-based methods that analyze the human language used in communications. In order for machines to understand human text and speech, NLP techniques need to be put in place. This includes Tokenization, Stemming, and Part-of-Speech (POS) Tagging. After the natural language processing is completed, the text will be ready for the classification process of machine learning.

  • Machine Learning:

Using existing data, machines are trained to recognize patterns in new data sets to predict the sentiment behind a given text and automatically classify it as positive, negative, or neutral.

AGAT Software recently released its first AI sentiment analysis engine, to learn more about it, contact us today.

Categories
webex guides

Webex Assistant: The go-to guide

What is the new Assistant in Cisco Webex about? What is it supposed to do? How can you benefit from it?

All of these questions and more will be answered in this blog post.

word image

Table of contents

  1. Introduction
  2. How to use it + Tips for improving usage
  3. How to use it in live meetings.
  4. Use Webex Assistant Voice Commands and Keywords
  5. How can you benefit from Cisco Webex Assistant?
  6. AGAT’s Take on Cisco Webex Assistant

1- Introduction

Webex Assistant for Meetings is an intelligent, interactive virtual assistant that makes meetings and webinars searchable and actionable. When Webex Assistant is turned on, the host and participants can capture the whole conversation including highlights and action items by clicking or using voice commands. The Assistant can also show a live transcript with captions.

The Webex Assistant contains many interesting features such as Speaker recognition (who said what and when), and the ability to recognize up to 100 languages (The maximum number of unique languages that can be used concurrently is 5).

Another feature worth mentioning is the fact that users can download the transcript of the meeting for any use they would like.

Webex Assistant is only available for paid Webex plans.

word image 1 1

2- How to use Cisco Webex Assistant

For a quick visual guide, we prepared this video

  1. Sign to Webex
  2. Go to Preferences → Scheduling
  3. For Webex Assistant, check “Automatically turn on the Webex Assistant whenever I start a meeting” if you want the Webex Assistant for Meetings to turn on automatically when you start a meeting.

If your Webex administrator hasn’t chosen to start the Webex Assistant for Meetings by default, you can override the admin settings with this option.

Otherwise, you can turn on the Webex Assistant during the meeting.

word image 2

To share the meeting content, check the “Automatically share the meeting highlights, recording, and transcript with meeting participants and invitees and allow them to make edits” option which will share the meeting content with participants and invitees and give them editing privileges.

3- How to use it in live meetings.

word image 3
  1. To turn on Webex Assistant, hover over the Webex Assistant word image 4 and select Turn on Webex Assistant.
  2. To turn off Webex Assistant, hover over the Webex Assistant and select Turn off Webex Assistant.
  3. When you’re sharing content, hover over the Webex Assistant on the floating bar at the top of your screen and select Turn on Webex Assistant.

To turn off Webex Assistant, select Turn off Webex Assistant.

4- Use Webex Assistant Voice Commands and Keywords

At any point during the meeting or webinar, you can switch the Webex Assistant on to enable voice operated note-taking.

By using specific phrases, the Webex Assistant can do things like creating tasks, taking notes, and setting up future meetings.

The way it works is by first saying the phrase “OK Webex” followed by a command to create a highlight.

Voice command

Voice command example

Example highlight in the Highlights Tab

OK Webex, create an action item…

OK Webex, create an action item to review the slide deck.

Action item

OK Webex, create an agenda…

OK Webex, create an agenda for this meeting to review our go-to-market release.

Agenda

OK Webex, create a decision…

OK Webex, create a decision to move ahead with the latest proposal.

Action item

OK Webex, create a note…

OK Webex, create a note that we updated the proposal.

Note

OK Webex, create a summary…

OK Webex, in summary, we are moving ahead with Friday’s release plan.

Summary

OK Webex, create a task…

OK Webex, create a task to review the list of candidates.

Action item

OK, Webex, …highlight that

OK Webex, the conference presenter canceled at the last minute, highlight that.

Note

OK Webex, schedule a follow-up meeting…

OK Webex, schedule a follow-up meeting for Monday at 3:00 P.M.

Action item

Webex Assistant schedules a Webex Meeting with the current attendees on the time and date specified.

Webex Assistant recognizes the following keyword phrases as triggers for Action Items and Decisions

Keyword group

Keyword phrases

Action item

  • Action item(s)
  • Can you schedule?
  • Follow up on
  • Follow up with
  • Next step(s)
  • Please schedule
  • We need to schedule
  • We should schedule

Decision

  • The decision is
  • We agree

Note

  • Capture that point
  • Take a note

5- How can you practically benefit from Cisco Webex Assistant?

The focus here is to talk about the advanced capabilities of note-taking, task management, and highlight creation offered by Cisco Webex.

Cisco Webex promises to cut down on effort made on meetings to capture important points and they are serious on delivering here.

The main benefit in our opinion is the capability to handle the meeting in one place, be it on writing notes or tasks, whatever is the necessity.

6-AGAT’s Take on Cisco Webex Assistant

AGAT software is now a long-time Cisco partner and our collaboration lets us take the advantage of Webex transcripts to take them to the next level.

At AGAT we recently released Agi, our AI Virtual Assistant. By incorporating AI into the meeting transcripts, Agi can automatically identify tasks and sync them into most task management platforms such as Asana, Monday.com, or Trello.

To learn more about Agi, please visit our Virtual Assistant webpage.

Categories
guide How To webex guides

Webex Spaces: The Ultimate Guide

Webex Spaces are the bread and butter of Cisco Webex. For new users and for those more experienced we would like to share everything you need to know to make your experience more productive and at the same time, easier.

Table of Contents:

  1. What are Webex Spaces?
  2. What is the difference between Spaces and Teams in Webex?
  3. What are Webex Spaces used for?
  4. How to Create a Space in Webex?
  5. What things are possible to do within Spaces?
  6. Limitations and common issues with Spaces
  7. How to add and remove members
  8. How to get a complete list of Webex Spaces

1- What are Webex Spaces?

Webex Spaces are a way to manage group chats in Webex. Every UC Vendor addresses the same need but uses different terms.  Skype for Business has Chat Rooms,  Microsoft Teams and Slack have Channels, and Webex has Spaces.

In other words, Spaces are a place to work in collaboration with one or more people. It includes an area for messages, files, whiteboards, and more. If you are looking to see what things are possible to do within Spaces, jump here

2- What is the difference between Spaces and Teams in Webex?

So let’s understand what is a Team in Webex. When needing to create Spaces, sometimes users would like to create different Spaces for the same group of people. To help with better organization, Webex offers the possibility to create a Team where multiple Spaces are hosted.

Practically speaking, Teams are often created with long-term purposes, eg: the design department can create a Team where each Space will refer to a different project. So in this case the team remains the same but as projects finish, so will the need for that Space.

Good advice: host your short-term conversations under Spaces and the rest under Teams.

3- What are Webex Spaces used for?

Webex Spaces are used for collaborating with multiple people at the same time. They allow to send messages and files, do video conferences and contain some other great features such as whiteboards and mentioning in messages.

4- How to Create a Space in Webex?

Creating a Space in Cisco Webex is a super easy task consisting of a few intuitive steps.

To create a new Space:

  1. Click  the “+” button next to the top search bar 
  2. Select the second option: “Create a Space”
  3. Add a name to the Space as well as the users. It can be contacts names or emails
  4. Voila! Your new Space is created

Take a look at this simple gif explaining the process:

lt reC3EG6rzsT5k9s5BbNpKHtfz2mRfwKOcg6RqcXGp3frLU02GmwAicy8Po0YwPbx6fV3iiwAv Tc1ohAU5YOljtjeiUuSEeoMiknYxT 9Xi1UfRDYVG po5fWnkjGPFd3BCOC

5- What things are possible to do within Spaces?

As mentioned above, Spaces are collaboration places to work with one or multiple people simultaneously. 

The following things are possible within Spaces

  1. Messages
    a. Text messages including emojis
    – Mention people by using the “@” character
    b. Send Pictures (displayed in the conversation)
    c. Send Gifs from Giphy
  2. Files
    a. Send any files, some (like spreadsheets and documents) have previews in the message feed
    – At the same time, the files get saved in the File tab for that Space
  3. Meetings: Have a meeting (Audio and Video) with the members of that Space
  4. Whiteboards: Under the Whiteboard tab, teams can interact with each other in a whiteboard, designed to sketch ideas
  5. Schedule: Get all the important events in the Space calendar
  6. Messages Actions:
    a. Start a thread from a message: by clicking the ⮪ symbol
    b. Add reaction by clicking the 😊 symbol
    c. Flag message by clicking the 🏴 symbol
    d. Delete message by clicking the 🗑 symbol

6- Limitations and common issues with Spaces and Webex in general

Although Cisco Webex offers a vast amount of options and configurations to collaborate, there are some limitations. Here we bring the most relevant:

-There can only be up to 25 participants in a meeting for Free or Messaging-only Webex Accounts. That limit goes up to 100 for paid Webex Accounts (also Webex calling) and to 200 for Webex Meetings host account or M2 Webex License.

-Data storage for free campaigns is not provided and users need to buy a license for that.

-Controlling communications with external users is not so easy to configure.

-Having a list of all the Spaces in the company for hosts can be a hard or even impossible task.

-Webex doesn’t come with a native data loss prevention filter for messages, files or images.

-Webex also have listed here some common platform issues with their respective workarounds in order to be able to solve them.

7- How to add or remove members from a Webex Space

To add people to a Space simply open the tab in the right and go to the list of people in the Space.

Then click on the blue + symbol that says “Add People”. You can then type the name of the contact or their email address to add

TwmfNVXXk5p2gl2lM4J6 oIn0D ZN1 HEWaYnZthS7fAb I9jVv8VbNk1WJfiuKEYVa8ebR cVOuq3SDdqlAD6ZP

To remove a participant from Space, first of all, you need to be the moderator of the Space. Then, go to the tab on the right on the participant section and click on the three dots (…) at the right of the participant you want to remove, click on “Remove from Space” and it’s done.

O96NP784 o1LeIBs2BX2ZZOLVhsgk6Zja1h2tEpQT88UMOxjXMV24DxYnFCCtAJEJcpnMSZr2I0VPDuYJ4tyGDH56NdIBx

7B- How to add or remove members from a Webex Space you are not a member of (or moderator)

In some cases, there is a need to add users to a Space by a user that is not a member of that Space, for example, by help desk user.

It can also be that Space with externals is left with no internal users. This Space may have content that you would like to have control of but is out of reach.

For the following scenarios, SphereShield Governance and Retention Policies offers a variety of features including an easy feature to add and remove members.

8- How to get a complete list of Webex Spaces

Many users in the past have inquired about how to get a list of all the Spaces within a company. 

Suppose you want to run an audit of your organization and be able to quickly identify which and how many Spaces contain external users, or identify which Spaces haven’t been used for a certain time. There is no easy way to view all organization Spaces available because each user can only see the Spaces that he is a member of.

For compliance needs, the officer might need to know in which Spaces a user was a member of in a case of auditing need. The Compliance Officer would also need to know who are the members of specific Spaces.

As we have mentioned, getting a list of all Webex Spaces is not supported yet. The great news is that SphereShield Governance and Retention for Webex can do this very easily, and even more. It just takes 3 steps to get your list:

1- Login to SphereShield Portal and in Webex Governance, go to Space Management.

2- Click in “refresh” so you get the latest data.

3- Now your list is in front of you. You can see the scope (internal/external), which members are in the Space, the last activity, the retention policy.

4- You can click on “export” and get a file with that information for easy processing and sharing.

On top of that, you can perform quick actions such as adding or removing members, blocking or unblocking a Space, and adding tags for organization purposes or adding a special retention policy.

svi681 dDvN4HdcJilXuZXtdedVcj7l53kNl1hHk3ei d7vGDcdtFoeUlF G7K98RAvEXWk3VhkbJ5R QgtV4nn 1zXmsX1ewa84hyzqNb58dndwzfM0aHWvuz9z9VbK K82MowK
uLv8 OTFv9DU2aSB6qea2doif1DCWAPEsz3FsO d2cOY4Lkd EiFkgjCj6829R8jgRTGdCU0Y3SFiRv9aht5yewVldtpxzB D25rq t0YmjiWkagnALoIprVzPGO4nvfOtI7A1O

Another very important feature, is that SphereShield lets you perform advanced searches using a vast number of criteria. So, for example, if the person wants to search which Spaces contain external users, or which Rooms haven’t been used for some time.

Here is a snapshot of how it looks

For more information, contact us and a specialist will be in contact with you.