BOOK MEETING
CONTACT US
Categories
blog Channel Management How To Microsoft Teams

How to Archive a Microsoft Teams Channel [GUIDE]

Microsoft Teams is one of, if not the, most popular UC platform for companies, especially that ever since covid hit back in 2019, companies had to switch to online/hybrid work. And that created a need to have everything digitized. But as is the case with all companies, the need for archiving is never ending.

Why is it important?

Companies deal with massive amounts of data over the years of doing business, whether it was folders/files. Communication and conversations, questions and answers and even pictures.

However, archiving is important by nature, the reason for this is that companies has to keep a record of their past customers, or communication anf information. Therefore it is needed to keep important relevant data.

Imagine a company back in the 1970’s that had all of their information, customers and even leads kept within a folder, in a drawer, in a room with hundreds and hundreds of other similar files.

Who would need it?

The usual need for archiving a channel in Teams becomes necessary when you have too many Channels with a lot of information (posts, tabs, images, GIFs, and your OOO alerts).

Another common case we hear is companies creating a new Channel in Teams when they have a new client/project/task and so on and so forth. What to do with those channels when you are done with them, do you leave them as is? Do you ignore them? Do you delete them?

A common solution for this problem is archiving those channels and AGAT introduced a creative, effective, and a genius way to address this issue.

How is Microsoft addressing this issue?

The way Microsoft addresses this issue is by archiving the whole team. And in our experience, companies use teams for various reasons, however, what is currently offered by Microsoft is the ability to archive a whole team. The way AGAT addresses it is by giving YOU the ability to archive a specific channel, along with the post, files, tabs, conversations and those good morning posts between colleagues.

What differentiates AGAT`s solution from other solutions?

What differentiates our solution from others is it`s friendly, comprehensive and easy to use UI. while being elegant, straightforward and quick.

The way we address archiving is by putting the channel that you want to archive in a specialized team called “Archiving team”. That would achieve the clean up and clutter removal, keep everything organized and in one place. And you can still access those archived channels with ease and convenience.

It is also as easy as following these simple steps:

  1. Log into your dedicated SphereShield portal
  2. Select MS Teams Management from the menu
  3. Click ‘Manage’ next to the Team that you want to archive a Channel from
  4. Press ‘OK’ 
  5. Sit back and watch the magic happen 😉

You can do this action repeatedly and archive however many Channels you want. This not only cleans up your environment, but also puts every unneeded Channel in one place, reduces cluttering, and it gives you the ability to access those archived Channels whenever you want. 

Avoid reaching the 200 Channel limit in Teams today! Contact us to try Channel Management for yourself.

MicrosoftTeams image 6 1024x346 1
MicrosoftTeams image 11
MicrosoftTeams image 12

Watch this short video to see how to archive a Channel in Teams:

Categories
guide How To Microsoft Teams

Tips on how to make the most out of the tools offered by Microsoft online meetings

Introduction:

Using Microsoft Teams as a collaboration tool is a great way to increase your team’s efficiency and productivity. 

Microsoft Teams is a communication tool that you can use to chat, share files and schedule audio and video meetings with your teams as well as with external users. 

In this article, we will give you all the details you need to know regarding scheduling a meeting in MS Teams as well as how to use the Microsoft Whiteboard to enhance collaboration. 

Scheduling a meeting:

Let’s start with scheduling the meeting. The MS Teams app allows you to schedule a new meeting from your calendar (which is connected with your Exchange/Outlook calendar) and send the meeting invitations using Outlook.

To schedule a meeting from the calendar, first, open your calendar and click on the ‘New meeting’ button in your MS Teams app.

aJMLMozPLR0g6GyBEaWVLP1VwiJwQwoJpggHmioob z2P4G1TY8xhf ToSvXV q7UwpnPpQ0TBTe3MkN f6oSJeJ

Click on the ‘Schedule meeting’ button from the dropdown menu.

j4g9coa5eVZ09f68sp2 sKY5tbqnu9p2t8evkUfNAkdDWDW2EJGtmm1pecUMdWSowVjl8iBbnGDyE2FTqrdWn fuYTQ iQVvFsHZi Cn6QrJmh0fhWWlHCIWesURS5g Oj9MZGt

Fill in the details of the meeting including the title, date, time, and the required attendees. You can also add optional attendees by clicking on the ‘+ Optional’ to enter their details. 

NxvBZw R6iYcVjw0h JxQ1CiTU1KKWiv1Plu3TXWMrJTWXvnXjz3pddBnBE P4Z8 axtF152lY4

In order to make sure you find a time where every member who should participate in the meeting is available click on the ‘Scheduling Assistant’ tab. Choose a specific date and time to see if everyone is available.

cUSUkSa6qyD0D7Kmagnod 0vmYOaLUdlld9ZZyW lZTp409jm00tvKQ 7CbNovGRs N LDuK D4LWqmWYbw3J6glpKdY1pkIoTpwxTAEnNOkNTUC2ukXTecEIYgx85cwS 8 Es8p

Allocated time is not suitable for everyone.

GxriTHA2N3HEZMhLHUTINvtlmoCdmaP0DqmMonNkku9HOmqhX 0jxhXh4TtoI8KfvxqLnQQHOUXQp6IiuRmf8JE0BPPCKrSfCt9fBAa 9OhC4j07qlXMOGu YxzhOzhnAWvbj Ub

Allocated time is suitable for everyone

Going back into the ‘Details’ tab:

YtauS2DwzhrLdhQl PSucj1jPJm2W HajwoNSyj ZeP3nDuhZv00XFswnRDG qDYqubHe57ZG2qDjg dZOr KO eQ6nsj1SKtQgCqG8xfkMrJZCPOXtQmfkuNYjsxl BM7DqL 3

If this is a recurring meeting you can set the recurrence to ‘Daily’, ‘Weekly’, ‘Monthly’, or a custom recurrence for example 2 days a week until the 7th of March 2022, and then click save.

cgklporRfVCmDXduPM1hB8lXpVSkouIscTvSwizTy3zBvJ97o4ONYXMWs6FY31I UObhhlNN9FmvcFgB TtwWavCnIHGVWtDwj BsVx7dy JiqiwfI0dWMsNgc

JNrazQEbVqoU2iBHC3XCMo4E3YZ0gdYPZeMsdpgbA2NMRqKItBoW

To add the meeting to a specific channel, simply type in the name of the channel in the ‘Add channel’ field and choose the destination channel from the drop-down menu. 

02CTtskhcGxywtMxEQhwkxbV5jAw3sBJcsjZDcBhHkPZqDrFoiVbscQu3icXAt zU6oD vC3Ho4Gs2hJ ge58mWhz7l4DAFVTglunRX RxI RpSMRtFPS yhOQkBIV24Rl5o9Yg4

Click on the ‘Send’ button to schedule the meeting and send it to the attendees.

Whiteboard:

The Whiteboard integration into Microsoft Teams meetings lets Teams meeting participants draw, sketch, and write together on a shared digital canvas, which can in turn improve the discussions during the meetings.

To start collaborating in Whiteboard, after you join the meeting, open the share tray from the top right corner in the meeting. 

dFmChwIml0v KgfR8ppSp5bFHEoxTkxspNFuuBds1Q9MSPwjl1

Double click on the ‘Microsoft Whiteboard’ option in the drop menu.

sGWW Hg5XVL7KMjaEMxvU8yQWYeBraDeLeT0GuEVZ8YMwiJUByXWL37xQw50txygR mjZOFFAhGmTLaFJnz dna6lMSbVoBqrTgZuFA0M

After that, the landing page for the Whiteboard will open with the ‘Create’ list open on the left part of the screen and the ‘Inking’ toolbar at the top. 

To add a text box to the canvas, simply click on the ‘Text’ button under the ‘Create’ section and then click on the canvas where you want the text to appear.

l0MDGodacN0fMbJm4L1BNph1Xx1Sg6RUBjGS5zcCeR6MWAbfDZL11YDU 5uQ8bJtmoW9mPYMws7Pq85

The same steps apply if you want to insert a note. A different page will open with options to choose between a single note (in different colors) or note grids as can be seen below.

kS8u3eVBU0ssPfbz3Qpns1cDOpHfky 732AY0G7NdRPPL75PTcBSJhiJI WsmQrP6PHSBol

To write in the note double click on it and start typing.

ero1nXO b7tnJ7LuuQrGv x5l5G57CbDdWH05ldus2NPnHuI9fWtTLN0UOQk3zLiLzJSjCBzLGiiy 8PRQyBW rmZBxA4qGHimjB11V7huhNnglv9xvAr75w7yIdjplt

Click on the ‘Reactions’ button to add reactions from the list.

6dsmrQc65WCz9P Yuy

MBDSBPDa3zva fr1KkCy6iRyaRoP7YO xdVYgT2N3rXtwopiibS7bp87NPqdHd kGbvbUwHlqcRLYhWJxXdPQ4f47bBzsOzSiB2u3QVQnemBcHiwq2Cz6Jj2qKUlMA7zq 2I3w9U

Select the highlighter from the inking toolbar at the top of the page to highlight different parts on the canvas. As you can see the word ‘Accounts’ is highlighted in the image below.

If you click on the pen, you can write using your mouse or a pen if you are using a touch screen monitor, the number ‘27’ in the image below was written using the Galaxy Pen from the inking toolbar. To change the highlight/pen color double click on the tool you wish to use and choose a different color.

d8C0iLG9d1urIgI4M U4HeFEQukk zNrKKnQjdeofGJkkfV1AQa1h bApHCVEGWbbYdBRkTcWRrUdj1zWVuJ8YiMunr5PRG

To allow all the participants in the meeting to share their ideas, click on the ‘Settings’ button at the upper right corner of the page and turn on ‘Other participants can edit’. 

2OYyejhHGvepTUYACTAO SM4 xlWxwNgWWqOb8RrpIX8RN8 GzwZfmfKLlyI59quM

When the Whiteboard collaboration is done, you can export the canvas as an image from within Whiteboard. Click on ‘Settings’ then ‘Export image (PNG)’ to download the Whiteboard.

fslxZQjJxPvLvNSTivbJVydjY3fzlnz1EfxpFwOPCKqyHmN3wbOOe9iZ56rX

When you end the meeting, you will find a ‘Whiteboard’ tab available in the group chat created for the meeting.

CsL1PcEES35pSJ9dIOYOEPdCnRFAGZ C VUZkrZseywy mGul0SyPV5DKtS 56Tzny1pC4ayLAwF6djjkHR B2a2zyZ

Here you will find the Whiteboard you created during the meeting. You can also edit the Whiteboard from this tab. 

Increasing productivity with Agi – AGAT’s AI Virtual Assistant

AGAT Software recently introduced Agi – an AI Meeting Virtual Assistant which enables companies to transform online meetings into productive outcomes by:

  • Automatically detecting tasks and notes which are then synced from your meetings into your preferred task management system such as Asana, Monday.com, Trello, Microsoft Planner, and more.
  • Automatically generating a meeting summary using AGAT’s AI engine.
  • Detecting insights like decisions and reminders, and automatically scheduling follow-up meetings.
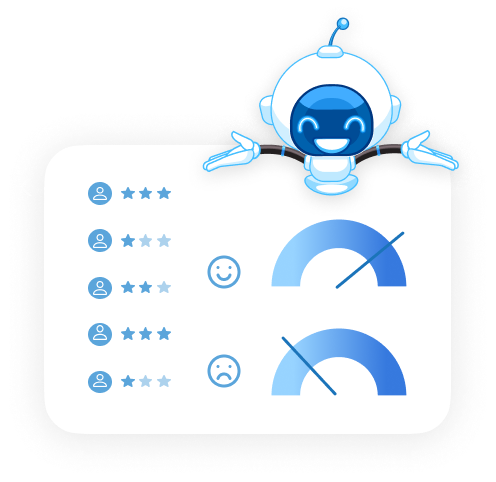
  • Performing AI sentiment analysis of the meeting to identify positive and negative interactions.
  • Implementing continuous collaboration from your meetings into your collaboration app allowing effective meeting discussions in the dedicated chat area.

To read more about Agi’s features check out our previous blog post.

Contact us today and one of our experts will get back to you as soon as possible.

Categories
guide How To webex guides

Webex Spaces: The Ultimate Guide

Webex Spaces are the bread and butter of Cisco Webex. For new users and for those more experienced we would like to share everything you need to know to make your experience more productive and at the same time, easier.

Table of Contents:

  1. What are Webex Spaces?
  2. What is the difference between Spaces and Teams in Webex?
  3. What are Webex Spaces used for?
  4. How to Create a Space in Webex?
  5. What things are possible to do within Spaces?
  6. Limitations and common issues with Spaces
  7. How to add and remove members
  8. How to get a complete list of Webex Spaces

1- What are Webex Spaces?

Webex Spaces are a way to manage group chats in Webex. Every UC Vendor addresses the same need but uses different terms.  Skype for Business has Chat Rooms,  Microsoft Teams and Slack have Channels, and Webex has Spaces.

In other words, Spaces are a place to work in collaboration with one or more people. It includes an area for messages, files, whiteboards, and more. If you are looking to see what things are possible to do within Spaces, jump here

2- What is the difference between Spaces and Teams in Webex?

So let’s understand what is a Team in Webex. When needing to create Spaces, sometimes users would like to create different Spaces for the same group of people. To help with better organization, Webex offers the possibility to create a Team where multiple Spaces are hosted.

Practically speaking, Teams are often created with long-term purposes, eg: the design department can create a Team where each Space will refer to a different project. So in this case the team remains the same but as projects finish, so will the need for that Space.

Good advice: host your short-term conversations under Spaces and the rest under Teams.

3- What are Webex Spaces used for?

Webex Spaces are used for collaborating with multiple people at the same time. They allow to send messages and files, do video conferences and contain some other great features such as whiteboards and mentioning in messages.

4- How to Create a Space in Webex?

Creating a Space in Cisco Webex is a super easy task consisting of a few intuitive steps.

To create a new Space:

  1. Click  the “+” button next to the top search bar 
  2. Select the second option: “Create a Space”
  3. Add a name to the Space as well as the users. It can be contacts names or emails
  4. Voila! Your new Space is created

Take a look at this simple gif explaining the process:

lt reC3EG6rzsT5k9s5BbNpKHtfz2mRfwKOcg6RqcXGp3frLU02GmwAicy8Po0YwPbx6fV3iiwAv Tc1ohAU5YOljtjeiUuSEeoMiknYxT 9Xi1UfRDYVG po5fWnkjGPFd3BCOC

5- What things are possible to do within Spaces?

As mentioned above, Spaces are collaboration places to work with one or multiple people simultaneously. 

The following things are possible within Spaces

  1. Messages
    a. Text messages including emojis
    – Mention people by using the “@” character
    b. Send Pictures (displayed in the conversation)
    c. Send Gifs from Giphy
  2. Files
    a. Send any files, some (like spreadsheets and documents) have previews in the message feed
    – At the same time, the files get saved in the File tab for that Space
  3. Meetings: Have a meeting (Audio and Video) with the members of that Space
  4. Whiteboards: Under the Whiteboard tab, teams can interact with each other in a whiteboard, designed to sketch ideas
  5. Schedule: Get all the important events in the Space calendar
  6. Messages Actions:
    a. Start a thread from a message: by clicking the ⮪ symbol
    b. Add reaction by clicking the 😊 symbol
    c. Flag message by clicking the 🏴 symbol
    d. Delete message by clicking the 🗑 symbol

6- Limitations and common issues with Spaces and Webex in general

Although Cisco Webex offers a vast amount of options and configurations to collaborate, there are some limitations. Here we bring the most relevant:

-There can only be up to 25 participants in a meeting for Free or Messaging-only Webex Accounts. That limit goes up to 100 for paid Webex Accounts (also Webex calling) and to 200 for Webex Meetings host account or M2 Webex License.

-Data storage for free campaigns is not provided and users need to buy a license for that.

-Controlling communications with external users is not so easy to configure.

-Having a list of all the Spaces in the company for hosts can be a hard or even impossible task.

-Webex doesn’t come with a native data loss prevention filter for messages, files or images.

-Webex also have listed here some common platform issues with their respective workarounds in order to be able to solve them.

7- How to add or remove members from a Webex Space

To add people to a Space simply open the tab in the right and go to the list of people in the Space.

Then click on the blue + symbol that says “Add People”. You can then type the name of the contact or their email address to add

TwmfNVXXk5p2gl2lM4J6 oIn0D ZN1 HEWaYnZthS7fAb I9jVv8VbNk1WJfiuKEYVa8ebR cVOuq3SDdqlAD6ZP

To remove a participant from Space, first of all, you need to be the moderator of the Space. Then, go to the tab on the right on the participant section and click on the three dots (…) at the right of the participant you want to remove, click on “Remove from Space” and it’s done.

O96NP784 o1LeIBs2BX2ZZOLVhsgk6Zja1h2tEpQT88UMOxjXMV24DxYnFCCtAJEJcpnMSZr2I0VPDuYJ4tyGDH56NdIBx

7B- How to add or remove members from a Webex Space you are not a member of (or moderator)

In some cases, there is a need to add users to a Space by a user that is not a member of that Space, for example, by help desk user.

It can also be that Space with externals is left with no internal users. This Space may have content that you would like to have control of but is out of reach.

For the following scenarios, SphereShield Governance and Retention Policies offers a variety of features including an easy feature to add and remove members.

8- How to get a complete list of Webex Spaces

Many users in the past have inquired about how to get a list of all the Spaces within a company. 

Suppose you want to run an audit of your organization and be able to quickly identify which and how many Spaces contain external users, or identify which Spaces haven’t been used for a certain time. There is no easy way to view all organization Spaces available because each user can only see the Spaces that he is a member of.

For compliance needs, the officer might need to know in which Spaces a user was a member of in a case of auditing need. The Compliance Officer would also need to know who are the members of specific Spaces.

As we have mentioned, getting a list of all Webex Spaces is not supported yet. The great news is that SphereShield Governance and Retention for Webex can do this very easily, and even more. It just takes 3 steps to get your list:

1- Login to SphereShield Portal and in Webex Governance, go to Space Management.

2- Click in “refresh” so you get the latest data.

3- Now your list is in front of you. You can see the scope (internal/external), which members are in the Space, the last activity, the retention policy.

4- You can click on “export” and get a file with that information for easy processing and sharing.

On top of that, you can perform quick actions such as adding or removing members, blocking or unblocking a Space, and adding tags for organization purposes or adding a special retention policy.

svi681 dDvN4HdcJilXuZXtdedVcj7l53kNl1hHk3ei d7vGDcdtFoeUlF G7K98RAvEXWk3VhkbJ5R QgtV4nn 1zXmsX1ewa84hyzqNb58dndwzfM0aHWvuz9z9VbK K82MowK
uLv8 OTFv9DU2aSB6qea2doif1DCWAPEsz3FsO d2cOY4Lkd EiFkgjCj6829R8jgRTGdCU0Y3SFiRv9aht5yewVldtpxzB D25rq t0YmjiWkagnALoIprVzPGO4nvfOtI7A1O

Another very important feature, is that SphereShield lets you perform advanced searches using a vast number of criteria. So, for example, if the person wants to search which Spaces contain external users, or which Rooms haven’t been used for some time.

Here is a snapshot of how it looks

For more information, contact us and a specialist will be in contact with you.